Room Architecture (plugin v2)
This page is for plugin version 2.X.X.
If you use plugin v1.X.X, please read the Room Architecture (plugin v1) page instead.
If you use plugin v3.X.X, please read the Getting Started page instead.
Understanding the architecture
Each room is composed by 2 objects : the level and the data.

The level is an Unreal level in which you create your room.
The data is an asset of type RoomData that define the room properties.
You can inherit from RoomData to add properties specific to your dungeon.
But remember, you must create one level per room (you can't use the same room level for multiple room data).
How to create a room
First, create a new Unreal level that will contains the actors and meshes of your rooms.
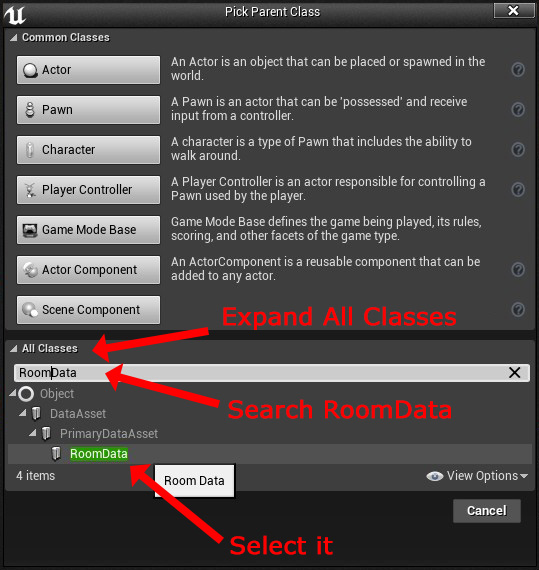
Then you can create a new blueprint class that inherits from RoomData.
(You can do this step only once for all your room data, or you can skip it if you don't need to add specific data to your rooms)
For that, expand the "all classes" and type "RoomData" in the search bar and select it.
Thus, you can add your own data inside this blueprint class. You can also make multiple RoomData blueprint classes, but I will don't tell you how Unreal works here ;)
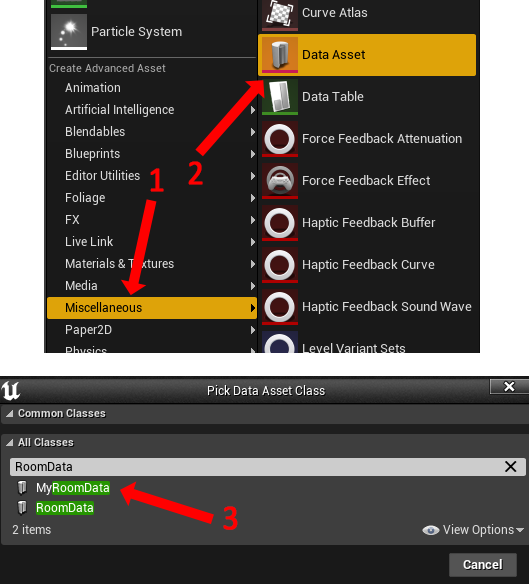
After that, you need to create an instance of your new RoomData class (using right click -> Miscellaneous -> Data Asset).
Then, open the RoomData instance you've just created and set the level field with your newly created level.

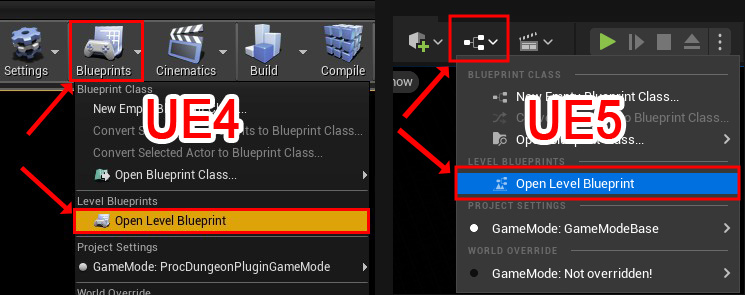
Then open your level, and go to the level blueprint (Blueprints -> Open Level Blueprint).
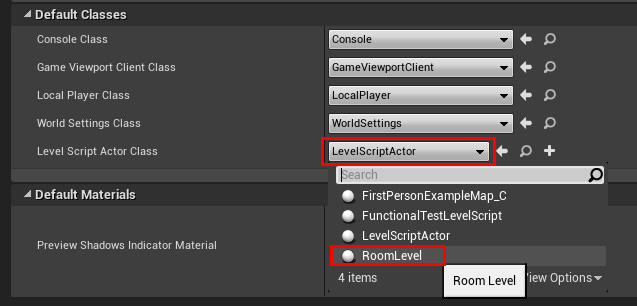
If it's not already done, reparent the blueprint to RoomLevel.
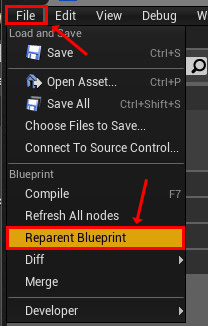
(In general you want to create a lot of rooms, so you can go to Project Settings -> Engine -> General Settings and set the Level Script Actor Class to RoomLevel thus you don't have to reparent each level)
Then, in the data field of this blueprint, set your room data you've just created.

There you have successfully created one room.
Remember, you must create 1 level and 1 data per room.
Room Parameters
If you have followed the previous steps to create a room, then you should have something like this:
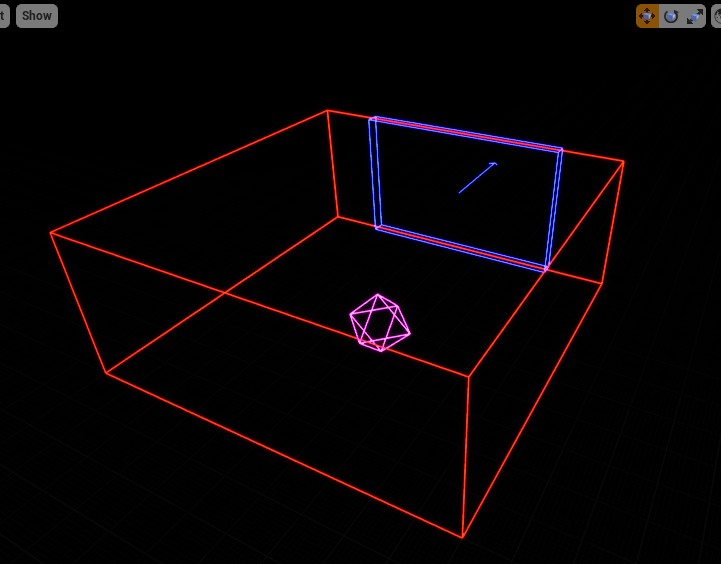
This is a unit room with a door oriented to the north.
All actors and meshes should not cross the red boundary, to avoid unwanted meshes' clipping through the walls of other rooms.
Doors are represented by a blue box.
The magenta sphere is the room origin (the "cell" at position (0,0,0)). This cannot be changed.
You can set the size of your room (the red box) in its RoomData instance.

This size is expressed in room units, can't be a float value and should not be negative nor zero.
For example, if your room unit is 10m*10m*4m and your real room size is 5m*23m*10m, then your room data size should be 1*3*3.
Your real room will not fills all the space of the red boundary box, and this is normal. The red box is just the "do not cross" limit to avoid overlapping between rooms.
By default, the room unit size is 10m*10m*4m and door size is 0.4m*6.4m*4m
However, you can change room unit and door size in Project Settings -> Plugins -> Procedural Dungeon to fit your project's design decisions.
For example, if you want more fine tuning, you can make 1 unit room equals 1cm*1cm*1cm. So you can set room size directly in centimeters.

Adding doors to your rooms
You can add as many door as you want in your room, and the entrance will be chosen randomly at generation (if checked in the RoomData instance) or will be the first door (index 0).
But keep in mind that a door has to be on the border of the room boundary (red box), not inside, and the arrow have to point to the outside of the room boundary.
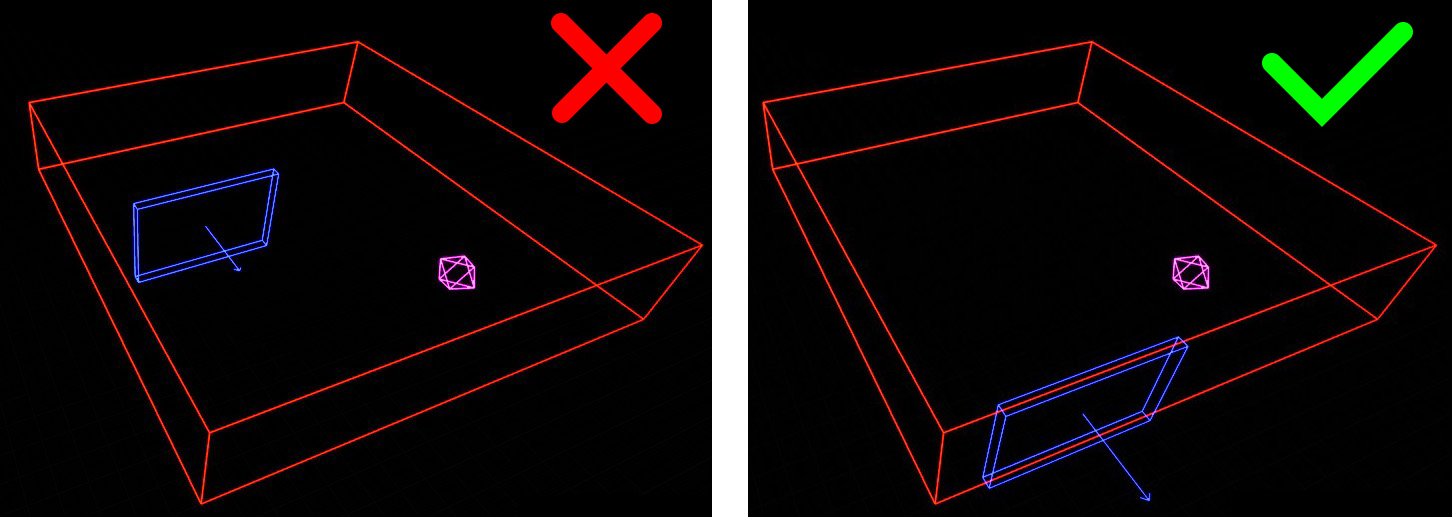
Door positions are expressed in room units and correspond to the "cell" of the room, and an orientation for the side of the "cell".
For example, a room of unit 1*1*1 have only one "cell" at position (0,0,0). So any door in this room will have this position of (0,0,0) and the side of the "cell" will be selected with North, East, West and South.